26 May How to Soundproof a Ceiling in a Basement
Soundproofing a ceiling in a basement is a crucial step for those working from home, running a home office, or engaging in any activity that requires privacy and minimal noise from the floor above. Sound transmission between levels can be disruptive, but with the right techniques, you can achieve a quiet and peaceful basement environment. This bog explains effective soundproofing methods for your basement ceiling.
Understanding Sound Transmission
To select the right soundproofing techniques, it’s important to understand how sound travels. There are three main ways sound can move:
- Direct Path: Sound waves travel directly from the source to the receiver.
- Flanking Path: Sound bypasses barriers and travels around them via other routes.
- Reverberation: Sound reflects off hard surfaces like walls and floors, creating a secondary reflection.
Effective soundproofing seeks to block or reduce these pathways to minimize noise transfer.
Assessing Your Needs
Identify Noise Sources
The first step is to identify the main sources of noise that affect your basement:
- Above Floor Activity: Noise from walking, moving furniture, or other activities on the floor above.
- Water Leaks: Sounds from water installations or plumbing issues.
- Household Appliances: Noise from washing machines, dryers, or HVAC systems.
Evaluate Current Sound Levels
Using a decibel meter on your smartphone can help you measure the current noise levels in your basement. This will give you an idea of how severe the problem is and help predict the effectiveness of your soundproofing efforts.
Consider Usage
Think about how you plan to use the basement. A home office will likely require more soundproofing than a storage room, so tailor your soundproofing approach to your needs.
Soundproofing Methods
Once you’ve identified your noise issues, you can choose the most suitable soundproofing techniques.
Here are several effective strategies:
Adding Mass
Increasing the mass of the ceiling is one of the most effective ways to block sound transmission.
Consider these options:
- Additional Drywall Layers: Adding another layer of drywall to the ceiling increases density and reduces sound transmission. Use resilient channels to prevent the new drywall from touching the existing ceiling, which minimizes sound vibrations.
- Mass Loaded Vinyl (MLV): A dense, rigid material that can be installed between ceiling joists or mounted on the ceiling. MLV is highly effective at blocking sound.
Decoupling
Decoupling isolates the ceiling from the floor above to prevent sound from traveling through impact vibrations.
Here’s how to do it:
- Resilient Channels: Attach resilient channels to ceiling joists and then cover them with drywall. These channels act as a buffer, reducing sound vibrations from the floor above.
- Sound Clips and Hat Channels: These are similar to resilient channels and create a space between the ceiling and the floor above, further reducing sound transmission.
Insulation
Insulation helps absorb sound and reduces its transfer through the ceiling:
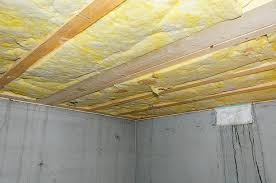
- Fiberglass Insulation: Install fiberglass batts between the ceiling joists. This is an affordable option that helps absorb sound and prevents it from traveling through the ceiling.
- Spray Foam Insulation: Expands to fill gaps and voids, providing excellent soundproofing. Though more expensive, it is highly effective and requires professional installation.
Soundproofing Panels and Tiles
Installing soundproof panels and tiles on the ceiling can significantly reduce noise:
- Acoustic Panels: These panels can be attached to the ceiling to absorb and diffuse sound. They are available in various designs, making them both functional and decorative.
- Soundproof Tiles: Similar to acoustic panels, soundproof tiles can be customized to fit your ceiling and provide excellent noise absorption.
Sealing Gaps
Sound can easily pass through gaps and cracks.
Make sure to seal all gaps to improve soundproofing:
- Acoustic Sealant: Use a flexible sealant around fixtures, outlets, and where the ceiling meets the walls to prevent sound leaks.
- Weather Stripping: Apply weather stripping to doors and windows in the basement to minimize sound leakage.
Flooring Considerations
Although the focus is on the ceiling, don’t overlook the floor. Materials such as carpets or rugs can absorb impact noise from above, further reducing the amount of sound reaching the basement.
DIY vs. Professional Help
DIY Soundproofing
Soundproofing is possible as a DIY project if you’re confident in your skills.
Here’s what you’ll need:
- Essential Equipment: Screwdrivers, drills, levels, measuring tape, knives, scrapers.
- Materials: Drywall, mass-loaded vinyl, resilient channels, acoustic panels, sealant.
- Safety Gear: Gloves, goggles, dust mask.
Hiring a Professional
If you’re unsure about completing the project yourself, hiring a professional is a good option. A professional will guide you on the best approach, ensure proper installation, and guarantee the accuracy and safety of the work.
Maintenance and Tips
To keep your ceiling soundproofed over time, follow these maintenance tips:
- Regular Inspections: Check for any new gaps or damage that could affect the soundproofing.
- Clean Surfaces: Keep acoustic panels and tiles clean to maintain their effectiveness in sound absorption.
- Noise Surveys: Periodically measure the noise levels in the basement to assess the effectiveness of your soundproofing efforts.


Sorry, the comment form is closed at this time.